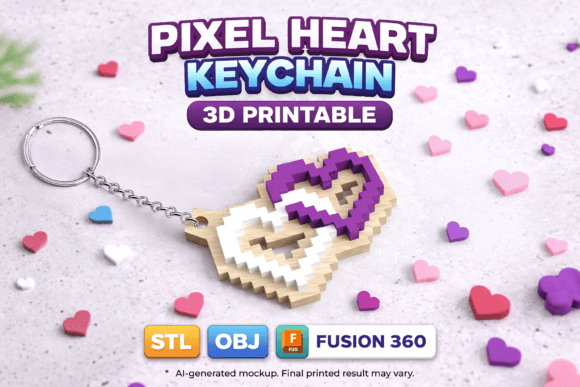
Pixel Heart Keychain 3D Printable: A Practical Guide to Flawless Results
The Pixel Heart Keychain 3D Printable model represents a modern fusion of nostalgic 8-bit aesthetics and contemporary additive manufacturing. It is not merely a digital file; it is a versatile foundation for creating tangible expressions of affection, personalized gifts, or small-scale commercial products. For makers ranging from hobbyists to professional entrepreneurs, this design offers a clean, layered block-style geometry that translates beautifully into physical form. However, possessing the file is only the first step. The difference between a charming keepsake and a frustrating print failure often lies in how the user approaches the preparation, customization, and printing process.
Understanding the Design Potential and Limitations
When you download the Pixel Heart Keychain 3D Printable package, you are receiving more than just an STL file. The inclusion of OBJ formats and the fully editable Autodesk Fusion 360 project file (.f3d) provides significant flexibility. This allows you to adjust the thickness, scale, and internal structure to suit specific needs, whether you are printing a delicate single-color charm or a robust multicolor accessory.
A common misunderstanding among beginners is assuming that "print-ready" means "set and forget." While the model features optimized geometry for both home and professional printers, the term refers to the integrity of the mesh, not the universal applicability of default settings. Every printer has unique characteristics regarding layer height, nozzle temperature, and retraction behavior. Ignoring these variables can lead to warping, poor layer adhesion on the pixelated edges, or support material that is difficult to remove from the intricate crevices of the heart shape.
Common Pitfalls in Slicing and Orientation
One of the most frequent errors when working with pixel art models like this keychain is improper orientation during the slicing phase. Users often place the flat side of the heart directly against the build plate to minimize supports. While this reduces print time, it frequently results in visible layer lines across the main face of the heart, ruining the crisp, blocky aesthetic that defines the design. Furthermore, if the keychain ring attachment point is oriented poorly, it may lack structural integrity, causing the item to snap under the weight of keys.
To avoid this, consider rotating the model so that the "pixel" faces are printed vertically. This approach ensures that the distinct layers of the 8-bit style appear as solid blocks rather than stepped ridges. Although this orientation requires more support material, the trade-off is a significantly higher quality finish that honors the original design intent. Additionally, always inspect the keychain loop area in your slicer software. Ensure that the connection point is thick enough to withstand daily use but thin enough to fit through standard keyrings without excessive force.
Material Selection and Color Strategy
The choice of filament plays a critical role in the final presentation of the Pixel Heart Keychain 3D Printable. Many users default to standard PLA because it is easy to print, but they overlook how different materials interact with light and texture. For a glossy, vibrant look that mimics polished plastic toys, PETG or high-quality PLA+ is often superior. These materials offer better durability and a smoother surface finish, which is essential for capturing the sharp edges of the pixel art.
If you are attempting a multicolor print using a single extruder, patience is key. Changing colors mid-print introduces risks such as oozing or color bleeding, which can blur the distinct boundaries between the pixel blocks. A better approach for those seeking a multicolor effect without complex hardware is to print the base shape in a neutral color and then apply hand-painted details or use vinyl decals. Alternatively, if you have access to a multi-material printer, ensure that your purge volume is calibrated correctly to prevent unwanted color contamination at the edges of each pixel block.
Leveraging Editable Files for Customization
The inclusion of the .f3d Fusion 360 file is a powerful asset that many users fail to utilize effectively. Relying solely on the pre-made STL limits your ability to adapt the design for specific clients or personal preferences. For instance, a small business owner might need to increase the wall thickness slightly to accommodate a thicker keyring mechanism, or a parent might want to resize the heart to fit a child's backpack zipper.
Without editing the source file, you are forced to rely on scaling within the slicer, which can sometimes distort proportions or create weak points in the geometry. By opening the project in Fusion 360, you can parametrically adjust dimensions while maintaining the structural logic of the model. This ensures that even if you double the size of the keychain, the relative thickness of the pixels remains consistent, preventing the model from looking too thin or too bulky. Always test a small section of your edited model before committing to a full production run.
Quality Control and Post-Processing Expectations
Even with perfect settings, post-processing is rarely optional for high-quality results. The pixelated nature of the design creates numerous small overhangs where support material can leave behind rough patches. Simply peeling off supports often leaves a pitted surface that detracts from the clean, modern look of the keychain. A practical solution involves using soluble support materials like PVA if your printer supports them, or employing a "break-away" support strategy where you carefully trim the material flush with the model surface.
Furthermore, do not underestimate the importance of a final inspection. Check for any loose pixels or weak connections between the heart body and the attachment loop. If you plan to sell these items, consistency is paramount. A single defective unit can damage your reputation as a seller of personalized 3D printed items. Establish a checklist for every batch: verify dimensions, test the strength of the loop, and ensure the surface finish meets your standards before packaging.
Making Informed Decisions Before You Print
Before downloading or purchasing the Pixel Heart Keychain 3D Printable, take a moment to evaluate your current setup and goals. Are you equipped to handle the support removal required for optimal orientation? Do you have the software skills to edit the .f3d file if customization is needed? If you are a beginner, start with a smaller print job to calibrate your machine settings before attempting a batch for sale.
Remember that the designer provides a ready-to-print model, but the responsibility for the final output rests with the operator. Adjusting supports, orientation, and material settings according to your specific printer is not a flaw in the design; it is a necessary part of the 3D printing workflow. By approaching the project with a mindset of preparation and attention to detail, you can transform this digital file into a high-quality, durable, and visually striking accessory that truly expresses love in 3D.